How To Attach A Nikon Camera To A Celestron Telescope?
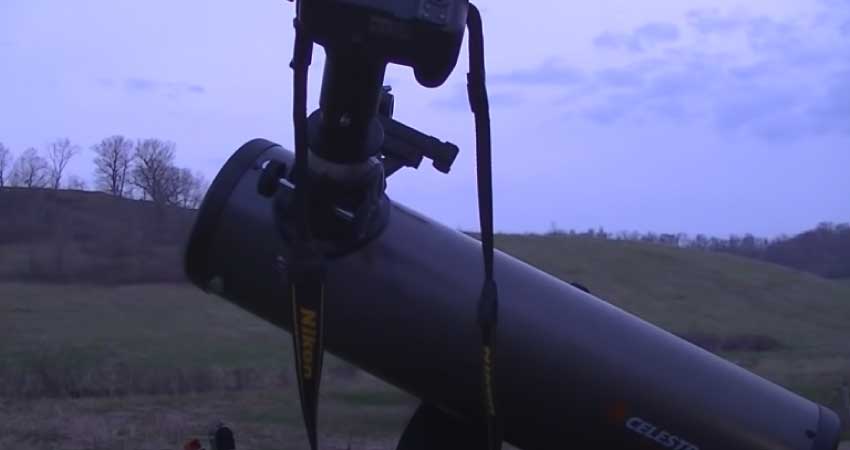
Who doesn’t love to be an astrophotographer? Do you intend to capture breathtaking photographs of the deep shining night sky with the ever-gorgeous moon? Simply take your Nikon camera and attach it to a Celestron telescope. Don’t know how to attach a Nikon camera to a Celestron telescope? Don’t worry. This article will give you a complete overview of connecting a Nikon camera with a Celestron telescope.
Following simple instructions, anyone can attach a Nikon camera to a Celestron telescope. Some people may perceive the task difficult because they have never tried it before. However, in reality, it is pretty simple. Just remove the lens, attach the T-ring and T-adapter, make some adjustments, and you’re done.
The article will provide clear attachment instructions along with any additional information. So, let’s start.
How to connect a Nikon camera to a Celestron telescope?
Attaching a Nikon camera to a Celestron telescope consists of three steps:
- Removing and connecting various components
- Securing the camera with a telescope
- Adjusting the shutter speed
Anyone can attach a Nikon camera to a Celestron telescope by following the procedures outlined above. So, here are the detailed instructions:
Step 1: Removing and attaching various components
- Switch off the Nikon camera.
- Remove the lens by tapping the lens-release button. Simply hold the button down while tilting the lens clockwise.
- Now Insert the T-ring counter-clockwise into the camera’s lens mount. Always keep in mind that different cameras require different T-rings. So, make sure that yours is compatible with the Nikon camera.
- Put the T-adapter through the T-ring.
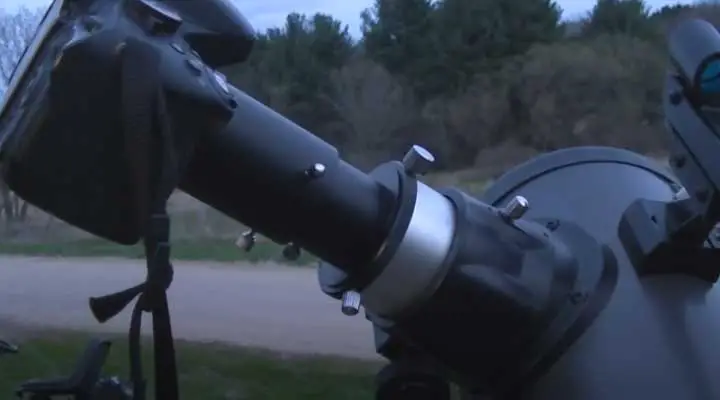
- Now, place the T-adapter into the focuser of the telescope.
- Fasten the thumbscrew on the focuser’s side to prevent the camera from sliding back during use. For added safety, one can tie the carry strap of the camera to the tube of the telescope.
Step 2: Securing the camera with a telescope
- Turn on the Nikon camera.
- Go to the camera’s “Manual” mode.
- Now inactivate the flash, noise reduction & autofocus modes of the camera
- To deactivate image compression, change the image mode from “JPG” to “RAW.” It will provide the users with high-quality images and more editing options in photo editing software.
Step 3: Adjusting the shutter speed
- If you want to focus on brighter objects, such as the moon, stars, or planets, set the ISO to 200 or even lower.
- In contrast, if your subject is a softer element such as planetary nebulae, galaxies, or emission nebulae, increase the ISO level by more than 200. A higher ISO level helps to capture sharper images. But unfortunately, it can enhance noise and cause image discoloration due to increased brightness.
- If you use a “push-to” mount, then fix the shutter speed to at least 30 seconds. Otherwise, extended shutter speeds can result in distorted star images since exposures longer than 30 seconds tend to unveil the Earth’s rotation.
- If a photographer prefers to use a “go-to” mount that keeps moving the telescope in a straight line with the Earth’s rotation, position the shutter speed to “Bulb.” This setting will allow the user to capture lighter, brighter, and more detailed images.
Telescope over a Camera Lens or Camera Lens over a Telescope?
There are significant differences between a telescope lens and a camera lens. For instance, Camera lenses do not have the same magnification as Telescope lenses that are vital for planetary imaging. Therefore, some people become confused about whether they should use a Telescope lens over a Camera Lens or a Camera Lens over a Telescope lens.
Both options have distinct advantages & disadvantages. As a result, knowing the benefits & drawbacks of each technique is necessary in order to determine which approach is best for that individual. Let’s explore the benefits & demerits of each method: 10 Of The Best Nikon Camera For Sports Photography In 2023.
Advantages & disadvantages of using a Telescope lens:
Pros
The key benefits of using a Telescope lens over a Camera Lens are as follows:
- It offers extended magnification or focal length options for detailed imaging
- Telescope lenses produce high-quality images.
- It provides accurate focus with a large aperture and a long focal length.
- It is suitable for astrophotography.
Cons
- Telescope lenses are bigger & heavier than the camera lenses
- It is comparatively expensive
Advantages & disadvantages of using a camera lens:
Pros
- Camera lenses are tinier, cheaper & more compact.
- It has an adjustable zoom function.
- It is ideal for wide-field photography.
- It is suitable for photographing in a brighter setting, such as daytime.
Cons
- The camera lens does not have an accurate focus.
- It provides less magnification than Telescope lenses.
Frequently asked questions
Can a digital camera be attached to a telescope?
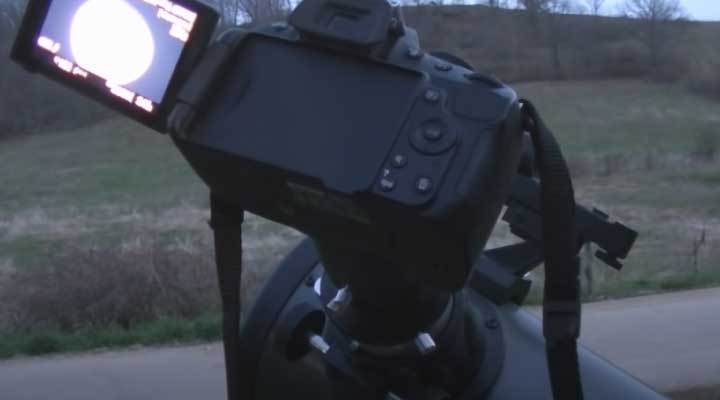
With the proper adapters, users can connect both single-lens reflex cameras & digital cameras to a telescope to capture images through a telescope. Furthermore, digital cameras are less expensive than single-lens reflex cameras. As a result, users can take aesthetic snaps of the moon with an irremovable lens at a low cost.
Is Nikon’s lens superior to Celestron’s?
It is dependent on the model. Nikon’s Monarch HG has a bit wider view field. Furthermore, it produces brighter and more detailed images than the Vortex or the Celestron. However, it will be more expensive than Celestron.
Final verdict
Many people want to capture the dazzling beauty of a moonlit night, but it is challenging to do with camera lenses. Furthermore, they are unclear on how to properly attach their camera to the telescope, despite the fact that the task is simple enough for someone with a basic understanding of camera settings. Taking this into account, I have described “How to attach a Nikon camera to a Celestron telescope.”
In addition, I’ve discussed the benefits and drawbacks of telescopes and camera lenses. As a result, users can choose whether to use a Telescope over a Camera Lens or vice versa. I hope the readers will find the article helpful.

I am Terry E. Collin.
I have some top branded cameras, especially Canon R6, Canon EOS 60D and 70D, Nikon D700, Lumix G9, Lumix G85, and many more. I have been doing photography for 5 years with Top Brand cameras like Canon, Sony, Nikon, Panasonic, etc.
The purpose of creating this blog is to share my personal experience and expertise with most popular cameras.
Let’s share some of them one by one in this blog For FilmingLab Audience

![How to Connect Nikon D3500 to Computer: [Solved]](https://filminglab.com/wp-content/uploads/2023/05/how-to-connect-nikon-d3500-to-computer-768x432.jpg)
