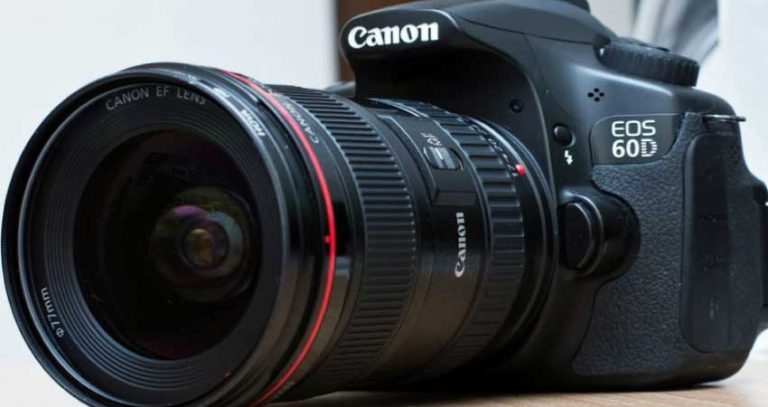
How to Take Videos On Canon Camera? Check Our 11 Step
Canon cameras have shown huge progress in both photography and cinematography. If you are a Canon fan I believe you are already aware of that. However, you might be concerned about, how to take videos on Canon Camera. How to set the Canon camera for shooting videos? I believe these queries have dragged you to our content.
Being a beginner, shooting videos with a DSLR may seem pretty tricky. Actually, it’s a straightforward process once you get the basics. It will just take 2 to 3 minutes after being accustomed to the settings. Firstly, switch to the video mode and begin to alter several settings which include video size, quality, Frame rate, shooting speed, and many more. Once you are done just click on the red ‘Live view’ button & start recording.
So, wasn’t it easy? You will get a proper idea about the camera & video settings once you jump inside our content. So, let’s not dilly dally and go for the detailed guidelines right away!
How To Record Video On Canon Camera? Check The Basic Settings Now!
‘How to take videos on canon?’
‘Can A newbie handle the Canon camera for shooting videos?’
Trust me, even if it’s your first time, you can conveniently use the Canon camera for videography once you get the basics. So, check the step-by-step procedure below and surprise everyone with your amazing videography skills.
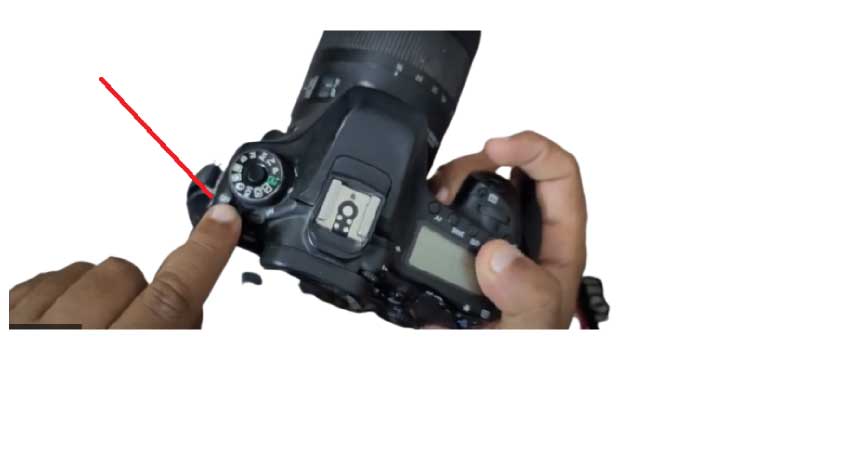
Step 1: Switch On the Video Mode
In the very beginning, switch the Canon camera to video mode.
- For this purpose the user has to press the Live View button. In some models, it is placed just beside the start/stop button whereas other models feature it on the left dial at the top.
- Now he can preview the looks of the footage through the LCD screen at the rear panel.
- We would highly recommend going for the manual mode during shooting as that offers a better & complete control.
Step 2: Set Up the Preferred Video Quality
You have to choose the video quality as per the requirements.
Firstly, click & on the menu button at the top & and enter the red menu. This menu will let you set up different features which include ‘.MP4 Vs. MOV’, video recording quality & size.
MPV VS. .MP4:
The. MPV model refers to the highest video quality (4K) with full HD features. The .MP4 mode doesn’t offer 4k but the video quality will be pretty decent and won’t require much editing. Canon Camera For Sports Photography.
Which Video Quality Should You Choose?
Actually, the video quality is totally a personal preference. If the user has enough time to invest in editing, it would be best to go for 4K. The full HD video recording quality offers two options including ‘Standard (IPB)’ & ‘(ALL I)’. Among them, Standard (IPB) is preferable if he plans to upload the footage directly into social media. Otherwise, the ‘(ALL I)’ full HD mode is best to edit the footage.
Step 3: Customize The Frame Rate
Now you have to set up the frame rates as fps can literally alter the vibes & feels of the footage. Go for low frame rates (around 24 fps) if you prefer a filmy look. On the contrary, high fps will offer the advantage of slowing down the video in post-production.
Step 4: Set The Focus Settings Up
For Proper videography, the camera should be on the right autofocus settings if you want the best performance. For this purpose –
- First of all, we would suggest turning off the ‘Movie Servo AF’ while recording the audio via the camera’s internal microphone. as a result; there won’t be any excess noises when the lens will focus on a scenario. You can keep the Servo autofocus on during shooting with the external microphone. That’s because the auto focusing sound doesn’t usually affect the external microphone.
- Now if the ‘Movie Servo AF’ is on, the videographer has to choose between different types of autofocus. The Single flexi zone is suitable to focus only on a specific subject. Go for the multi flexi zone to shoot a moving subject within a wide area.
Step 5: Set The Preferred Picture Style
Nowadays; it is certainly easy to edit pictures as per preferences. However, in order to shoot a video, selecting the picture style beforehand is a must indeed.
- Firstly, choose a style among portrait, landscape, or monochrome and click on the info & edit button for further settings.
- If the user plans to invest time in editing the footage, it would be best to go for the flat image style. Just reduce the highlights, contrast & saturations in this context.
- However, if editing is not your thing, it would be best to go for the portrait or landscape style directly.
Step 6: White Balance Settings
Unlike photographs, it’s really hard to alter the white balance once you are done shooting the video. For white balancing, firstly go to the white balance menu and look for ‘K’ which stands for ‘Kelvin’. For video shooting in daylight; 5500 kelvin is best as it gives off a warm vibe. On the contrary, 3200 kelvin is preferable for shooting mesmerizing videos at night. This range is awesome to get a bluish cool tone.
Step 7: Check The Shutter Speed
Be very aware to check out the shutter speed before recording the videos. The shutter speed must be more (around double) than the frame rate. Such a ratio will assist in achieving a smooth & cinematic motion. For instance, the user must choose 1/100 shutter speed when the frame rate is around 50 fps.
Step 8: Aperture Settings
The aperture settings help in focusing the subject while controlling the field’s depth. A low aperture is best for focusing on the subject while creating a blurry background. If you are taking a video of a crowd, going for high aperture (around f/22) is a must.
Step 9: Alter The ISO Range
Lastly, alter the ISO to control the sensitivity & brightness of the video. High ISO generally offers more brightness. However, it will also omit many details & will create grainer footage.
Step 10: Apply for The Required Exposure Compensation
Actually; a user doesn’t have to set up the exposure particularly as cameras can control exposure while shooting by default. However, he can adjust the camera if the footage is underexposed or overexposed. In order to perform the exposure shift,
- Firstly, turn on the display mode that features the exposure meter in the screen. Just click on the DISP button to alter the displays.
- Hold the Exposure Compensation button and rotate it as per your preferences. Moving it toward the right will offer a bright shade whereas the left side will ensure a dark video.
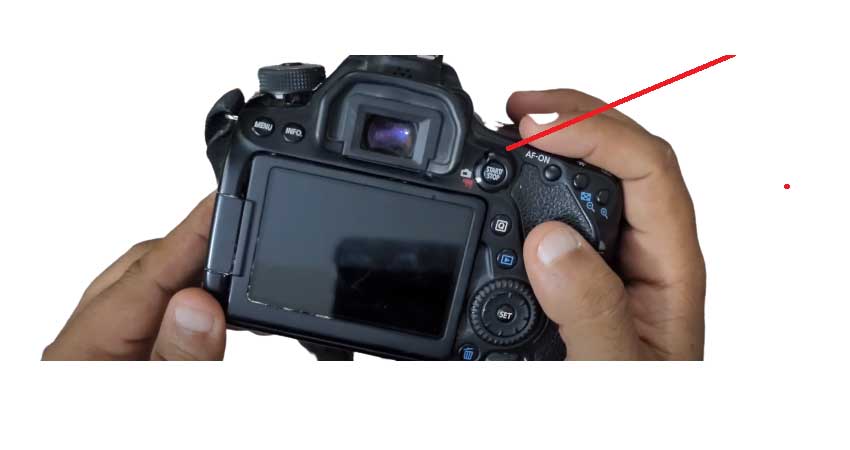
Step 11: Press The Button & Record
So, yeah you are done with all the required settings. Now press on the red Live View button & be ready to shoot!
How To Record Video On Canon Camera: FAQs
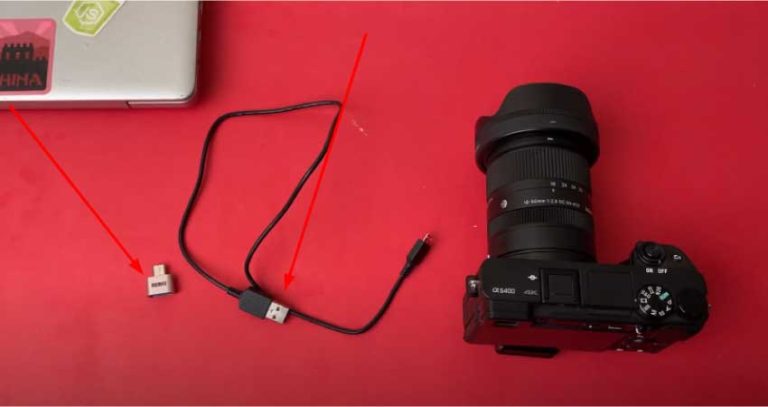
How to save videos from a Canon camera to a phone?
The easiest and cheapest method to save videos from a camera to a smartphone is to use an adapter. Nowadays all mobile phones can connect to a type C or micro USB port. Let’s look at the quick steps now!
- Turn on the camera and plug in the camera’s USB cable.
- Attach the other part with an adapter & connect the smaller part of the adapter to the smartphone.
- After connecting, you have to select an app through which you can browse the camera’s storage. In this context; click on camera importer & it will scan the storage automatically.
- Now select the content to transfer and press import.
- After import, the contents will be available within your SD or internal storage.
Final Words:
Being a first-timer; operating the Canon camera alone for videography was certainly not easy. So many settings together must be quite puzzling. However, I believe our content has definitely given you some relief. After going through our step-by-step guidelines, you will be able to operate it after a few trials. So, are you ready to set up your Canon camera to take mesmerizing videos right now?
Most Common Problems For Canon Camera Users
How to Zoom in on a Canon Camera
How To Delete Photos From SD Card on Canon Camera
How To Connect Canon Camera To Wi-Fi
How To Turn On Flash On Canon Camera
How To Turn off Flash on Canon Camera

I am Terry E. Collin.
I have some top branded cameras, especially Canon R6, Canon EOS 60D and 70D, Nikon D700, Lumix G9, Lumix G85, and many more. I have been doing photography for 5 years with Top Brand cameras like Canon, Sony, Nikon, Panasonic, etc.
The purpose of creating this blog is to share my personal experience and expertise with most popular cameras.
Let’s share some of them one by one in this blog For FilmingLab Audience